I don't know if you guys have noticed. WordPress The default PHP mail functionality doesn't work well. And it often sends important emails directly to the spam folder, if at all.
We ourselves use SMTP servers to ensure that we receive e-mail every time. But many newbiesleave a message, setting up a mail server is complicated, and we hope to come up with a tutorial for newbies. Then we will show you below.
Why use an SMTP server to send WordPress emails?
Many webmasters often struggle with WordPress not being able to send emails. By default, WordPress sends emails through the PHP mail feature. However, not all WordPress hosting servers are properly configured to use PHP mail.
Even if an email is successfully sent, it may be recognized as spam. These e-mails may be automatically deleted without being seen.
The best way to make WordPress emails deliverable is to use theSMTP server. It is the standard protocol for sending e-mail over the Internet.
SMTP servers use proper authentication to ensure that emails are sent from authorized senders. Delivery rates are improved and e-mail arrives securely in the user's inbox.
Now, for a plugin to connect a WordPress site to an SMTP server. We generally useWP Mail SMTP PluginWP Mail SMTP is also available in a free version. And there is a free version of WP Mail SMTP available.
Install the WP Mail SMTP plugin for WordPress
The first step is to install and activate the WP Mail SMTP plugin.
After activation, you will see the WP Mail SMTP Setup Wizard. You can skip the wizard and we will demonstrate how to set up the plugin manually.
![Image[1]-How to send WordPress emails with free SMTP server - Photon Fluctuation Network | Professional WordPress Repair Service, Global Reach, Fast Response](https://www.361sale.com/wp-content/uploads/2024/09/2024092102185421.png)
Click on the bottom "Back to Dashboard"The link will do.
You should see it now.WP Mail SMTP " set uppage, where plugins can be configured.
If you bought a Pro license, you need to paste the license key and click "Authentication Key" button. The license key can be found in the Account area of the WP Mail SMTP website.
![Image [2] - How to send WordPress emails with free SMTP server - Photon Fluctuation Network | Professional WordPress Repair Service, Worldwide, Fast Response](https://www.361sale.com/wp-content/uploads/2024/09/2024092102200626.png)
You need to enter the sender's email and sender's name first.WordPress emails will be sent from this email address and name.
Should check the box "Forced from email" box. This ensures that all emails for your WordPress site are sent from that email address via an SMTP server.
![Image [3] - How to send WordPress emails with free SMTP server - Photon Fluctuation Network | Professional WordPress Repair Service, Global Reach, Fast Response](https://www.361sale.com/wp-content/uploads/2024/09/2024092102211628.png)
Next, scroll down to the Mail Programs section where you can select the SMTP mail service. Just click on the one you want to use.
![Image [4] - How to send WordPress emails with free SMTP server - Photonflux.com | Professional WordPress Repair Service, Worldwide, Fast Response](https://www.361sale.com/wp-content/uploads/2024/09/2024092102240646.png)
The next steps depend on the service selected.
We'll cover how to set up multiple free SMTP servers step-by-step. To keep the WP Mail SMTP Settings tab open, then follow the instructions for the selected SMTP server:
1. Use Gmail SMTP server to send WordPress emails
It is possible to send SMTP emails with a free Gmail account. If you don't have a Gmail account, create one before proceeding.
With a free Gmail account, you can send up to 500 emails per day. However, with a paid Google Workspace account, the limit increases to 2000 emails per day.
Log in to the WordPress Admin Dashboard and install WP Mail SMTP. in theWP Mail SMTP " SettingsOn the page, select "Google / Gmail" as the mail program.
Now, connecting WordPress plugins to Gmail and other Google services is a bit of a hassle. However, thePaid version of WP Mail SMTPProvides quick and easy one-click setup. If you find it troublesome, you can choose the paid version.
will"One-click Setup" option is switched to the on position.
![Image [5] - How to send WordPress emails with free SMTP server - Photon Fluctuation Network | Professional WordPress Repair Service, Worldwide, Fast Response](https://www.361sale.com/wp-content/uploads/2024/09/2024092102292471.png)
You will see a notification that you need to save your settings to continue, click "Save Settings"Button.
When scrolling down the page, you will see that there is now a "Sign in with Google" button. Click this button to authorize the plugin.
![Image [6] - How to send WordPress emails with free SMTP server - Photon Fluctuation Network | Professional WordPress Repair Service, Worldwide, Fast Response](https://www.361sale.com/wp-content/uploads/2024/09/2024092102301816.png)
You will be asked to select a Google account, agree to the Terms of Service, and click "Allowed"button to allow WP Mail SMTP to send emails.
In this way, the current website is successfully associated with Google. You can start sending emails via Gmail.
2. Send WordPress emails using SendGrid SMTP server
SendGrid offers a free plan to send up to 100 emails per day for free.
initial accessSendGridwebsite and click "Free Start" button to create a free account.
After creating an account, the verification process. The account will be temporarily suspended while they ask you some questions via email. They do this to ensure that the service is used in a manner consistent with their policies and values.
Once the request is approved, you can log in to the SendGrid dashboard.
Creating a Sender Identity
The first step is to create the sender identity, which is used for email "From: (email header)"Address. To do this, at the bottom of the dashboard menu in the "set upIn the "section" click on"Sender authentication".
![Image [7] - How to send WordPress emails with free SMTP server - Photon Fluctuation Network | Professional WordPress Repair Service, Worldwide, Fast Response](https://www.361sale.com/wp-content/uploads/2024/09/2024092102411083.png)
Go to the SendGrid Sender Authentication page.
Scroll down to the Individual Sender Authentication section and click "verify the address"Under."commencement"Button.
![Image [8] - How to send WordPress emails with free SMTP server - Photon Fluctuation Network | Professional WordPress Repair Service, Worldwide, Fast Response](https://www.361sale.com/wp-content/uploads/2024/09/2024092102442466.png)
This will display a form where the sender can be created.
Then, enter the name, email address, and mailing address to be used for email. When you are done, you can click "establish" button to store sender details.
![Image [9] - How to send WordPress emails with free SMTP server - Photon Fluctuation Network | Professional WordPress Repair Service, Worldwide, Fast Response](https://www.361sale.com/wp-content/uploads/2024/09/2024092102480328.png)
Important Tip:This."Re."The email address needs to match the one entered in the WP Mail SMTP settings "From: (email header)"Same address.
A confirmation email will be sent to your inbox to verify this corporate email address.
Click the link in the message to complete the individual sender identity setup.
![Image [10]-How to send WordPress emails with free SMTP server - Photon Fluctuation Network | Professional WordPress Repair Service, Worldwide, Fast Response](https://www.361sale.com/wp-content/uploads/2024/09/2024092102495994.png)
After verifying the email address, continue and return to the SendGrid dashboard by clicking the Dashboard link in the sidebar.
Generating API Keys
The next step is to generate an API key so that you can connect your website to your SendGrid account and start sending emails.
Using the SendGrid dashboard menu, to find the Email API section and click "Integration Guide"The
![Image [11]-How to send WordPress emails with free SMTP server - Photon Fluctuation Network | Professional WordPress Repair Service, Worldwide, Fast Response](https://www.361sale.com/wp-content/uploads/2024/09/2024092102504197.png)
On the next page, you will be asked to select an integration method.
In the SMTP Relay box, continue and click "option"Button.
![Image [12]-How to send WordPress emails with free SMTP server - Photon Fluctuation Network | Professional WordPress Repair Service, Global Reach, Fast Response](https://www.361sale.com/wp-content/uploads/2024/09/2024092102513394.png)
To specify a name for the API key, it's handy to be reminded later what you're doing with it.
In this example, we named it "WP Mail SMTP".
![Image [13] - How to send WordPress emails with free SMTP server - Photon Flux Network | Professional WordPress repair service, worldwide, fast response](https://www.361sale.com/wp-content/uploads/2024/09/2024092102522843.png)
Now, you can click on "Creating Keys" button to generate the API key.
You should see a message confirming that it was successfully created and the API key will be displayed below.
You will need this key in the next section, keep the SendGrid tab open in your browser.
Connecting WP Mail SMTP to a SendGrid Account
Next, return to the WordPress Admin Browser tab and go to theWP Mail SMTP " SettingsThe SendGrid should already be selected for the mail program. The SendGrid should already be selected for the mail program. if not, select it now.
At the bottom of the screen, you will see a box for entering the SendGrid API key. Simply copy and paste it here and click "Save Settings"Button.
![Image [14] - How to send WordPress emails with free SMTP server - Photon Fluctuation Network | Professional WordPress Repair Service, Worldwide, Fast Response](https://www.361sale.com/wp-content/uploads/2024/09/2024092102533871.png)
Next, you need to check if your license integration is valid.
First, go to the Email Testing tab in the WP Mail SMTP settings. Then, enter the e-mail address and click "mail"Button.
![Image [15]-How to send WordPress emails with free SMTP server - Photon Fluctuation Network | Professional WordPress Repair Service, Worldwide, Fast Response](https://www.361sale.com/wp-content/uploads/2024/09/2024092102543095.png)
You should see a message indicating that the test email was successfully sent. You can confirm this by going to your inbox and checking to see if the email is there.
Now that the test email has been successfully sent, return to the tab containing the SendGrid API page. You need to continue and check the "I have updated my settings" box. Then click on the "the next step::Verification Integration"Button.
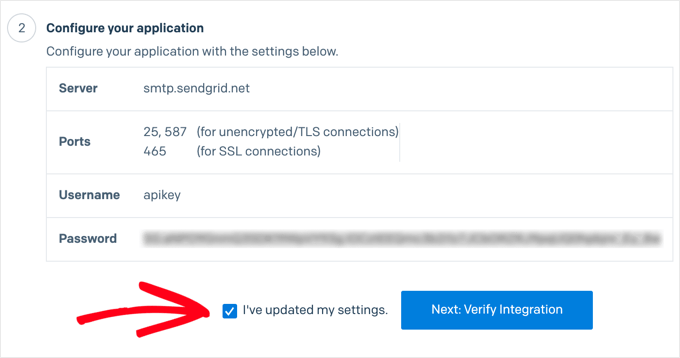
On the next screen, click "Verification Integration"Button.
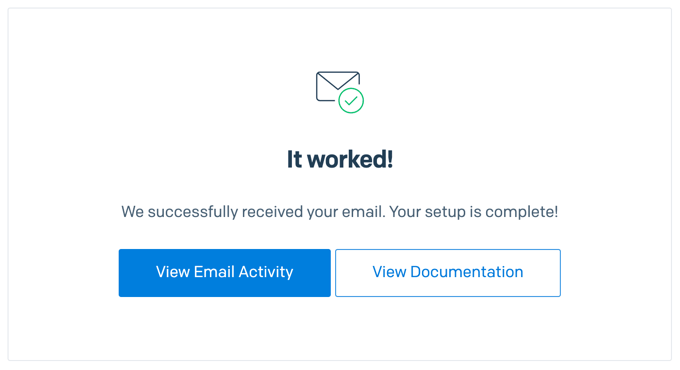
You will then see a message confirming that SendGrid has received the email and that your setup is complete.
Test that SMTP mail is working properly
The final step in all of these methods is to send a test email whether everything works.
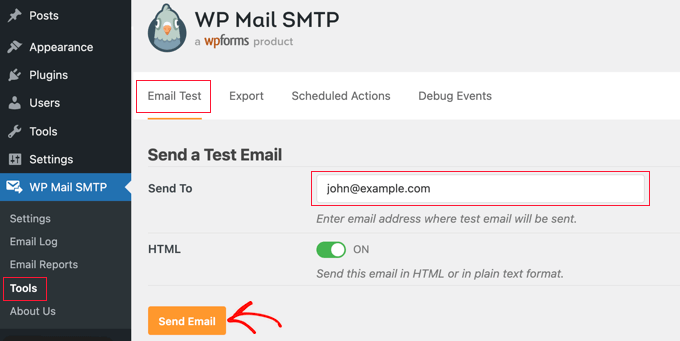
First, go to WP Mail SMTP Settings under "Email Testing" tab. Then, enter the e-mail address to which you want to send the test e-mail (if it is different from the default address).
Click "Send an e-mail."button and the email will be sent.
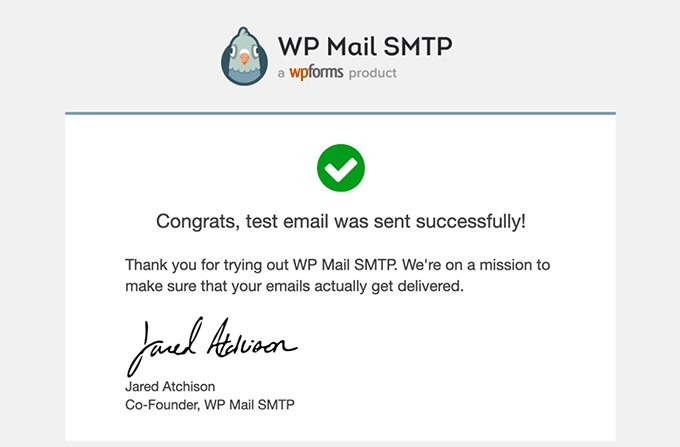
You should see a message informing you that the email was successfully sent.
Next, go ahead and check your inbox to make sure the test email has arrived.
Link to this article:https://www.361sale.com/en/20295
The article is copyrighted and must be reproduced with attribution.






![Emoji[lenghan]-Photonflux.com | Professional WordPress Repair Service, Worldwide, Fast Response](https://www.361sale.com/wp-content/themes/zibll/img/smilies/lenghan.gif)


No comments