Customized for improved management efficiency and user experienceWordPress Admin DashboardAppears to be important. ByHide unnecessary items, adjust the management screen layout and optimize the color scheme, you can create a more organized and efficient workspace. This guide will detail how to customize your WordPress admin dashboard to help you streamline your website management.
![图片[1]-自定义WordPress管理仪表板:全面指南提升网站管理体验-光子波动网 | 专业WordPress修复服务,全球范围,快速响应](https://www.361sale.com/wp-content/uploads/2024/09/2024090203375395.png)
Why should I customize my WordPress admin area?
Those who have been managing a WordPress site for a while may have noticed that the admin area is filled with various widgets, notifications, and menu items.
common problems
- Cluttered management areas: Plugins and themes tend to add their own widgets and menu items to the admin dashboard, resulting in a cluttered interface.
- Unnecessary notifications and alerts: Even when some notifications are turned off, many other items remain on the admin screen, adding to the visual burden.
- Increased operational complexity: Too many options and menu items can be overwhelming for beginners and affect the efficiency of site management.
Benefits of Customization
- Enhance work efficiency: By hiding unnecessary elements, you can focus on critical tasks with fewer distractions.
- Streamline the user experience: Customized dashboards are more in line with your habits and make the management process smoother.
- Enhanced website security: Hiding certain administrative menu items can reduce potential security risks and prevent unauthorized access.
Customize WordPress Admin Area Dashboard
By following the steps below, you can fully customize the WordPress admin dashboard to better suit your needs and usage habits.
1. Using screen options to hide management elements
The top right corner of the WordPress admin page usually has a "Screen Options" button that allows you to control the elements displayed on the page.
procedure
- Access to the administration page::
- Log in to the WordPress admin backend and navigate to the page you want to tweak, e.g. "instrument panels"or"All Posts".
- Open Screen Options::
- Click on "Screen Options" button, a drop-down menu will pop up showing the elements that can be controlled.
![图片[2]-自定义WordPress管理仪表板:全面指南提升网站管理体验-光子波动网 | 专业WordPress修复服务,全球范围,快速响应](https://www.361sale.com/wp-content/uploads/2024/09/2024090202341831.png)
- Select the elements to show or hide::
- Uncheck unwanted widgets or columns, such as hide "Quick Edit"Columns or uncommon widgets.
- Rearrangement of widgets::
- In "instrument panels" page, you can drag and drop widgets to adjust their positions.
![图片[3]-自定义WordPress管理仪表板:全面指南提升网站管理体验-光子波动网 | 专业WordPress修复服务,全球范围,快速响应](https://www.361sale.com/wp-content/uploads/2024/09/2024090202380396.png)
caveat
- Personalized Settings: The changes to the screen options areFor individual users, does not affect other users' settingsThe
- regular inspection: With the installation of plugins and theme changesNew elements may be added to the administration pageThe screen options are regularly checked and adjusted to help keep the interface tidy.
2. Customizing the block editor screen
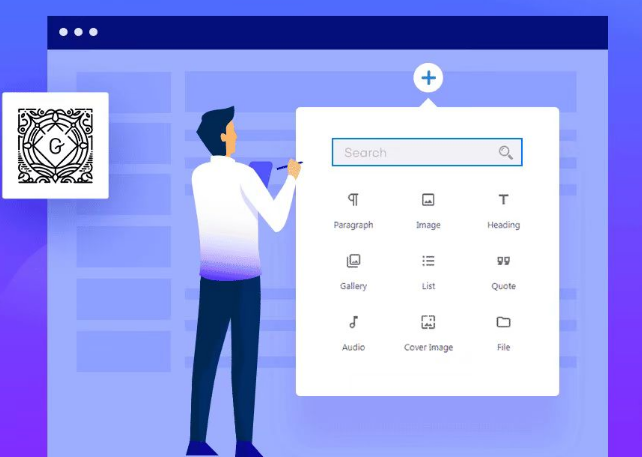
WordPress block editor (Gutenberg) is a powerful tool for creating and editing content. The content creation experience can be optimized by adjusting the block editor settings.
procedure
- Accessing Block Editor Preferences::
- On the Block Editor page, click the three-dot menu button in the upper right corner and select "preference".
![图片[4]-自定义WordPress管理仪表板:全面指南提升网站管理体验-光子波动网 | 专业WordPress修复服务,全球范围,快速响应](https://www.361sale.com/wp-content/uploads/2024/09/2024090202453030.png)
- Adjusting general settings::
- block level: in "conventional (weapons)"Under the tab, enable the "Show Block Breadcrumbs" option to display block hierarchy clues at the bottom of the editor.
- Document Settings: You can choose from categorized directories, tags, topics, filtered attributes, featured images, summaries, discussions, etc. Content that is not wanted can be hidden.
![图片[5]-自定义WordPress管理仪表板:全面指南提升网站管理体验-光子波动网 | 专业WordPress修复服务,全球范围,快速响应](https://www.361sale.com/wp-content/uploads/2024/09/2024090202590458.png)
- Show or hide available blocks::
- Switch to "lump (of earth)" tab, select the type of block to be shown or hidden in the editor, simplifying the editing interface and avoiding unnecessary distractions.
![图片[6]-自定义WordPress管理仪表板:全面指南提升网站管理体验-光子波动网 | 专业WordPress修复服务,全球范围,快速响应](https://www.361sale.com/wp-content/uploads/2024/09/2024090203005198.png)
![图片[7]-自定义WordPress管理仪表板:全面指南提升网站管理体验-光子波动网 | 专业WordPress修复服务,全球范围,快速响应](https://www.361sale.com/wp-content/uploads/2024/09/2024090203072646.png)
- Save Settings::
- After completing the setup, click on the top right corner of the "X" returns you to the post editor. The editor interface will adjust to your settings.
draw attention to sth.
- Customized Requirements: Improve editing efficiency by selectively displaying the necessary blocks and panels according to your content creation needs.
- User Experience Optimization: Simplifying the editing interface helps to reduce errors and improve the quality of content.
3. Show or hide administrative menu items
As more plugins are installed, the menu items on the left side of the admin dashboard can become redundant. This is accomplished through theHide unnecessary menu items, which can simplify navigation and improve management efficiency.
Menu management using plug-ins
It is possible to useAdmin Menu Editorplugin, which allows you to easily manage and customize the admin menu items.
Installation and Activation
- Installation of plug-ins::
- In the WordPress admin backend, navigate to "Plugins" > "Add New Plugin".
- Search for "Admin Menu Editor", find it and click "Install", then "Activate".
![图片[8]-自定义WordPress管理仪表板:全面指南提升网站管理体验-光子波动网 | 专业WordPress修复服务,全球范围,快速响应](https://www.361sale.com/wp-content/uploads/2024/09/2024090203112775.png)
- Configuring menu items::
- After activating the plugin, navigate to "set up" > "Menu Editor"Page.
- The left sidebar displays all main menu items, and clicking on a menu item allows you to view its sub-items.
![图片[9]-自定义WordPress管理仪表板:全面指南提升网站管理体验-光子波动网 | 专业WordPress修复服务,全球范围,快速响应](https://www.361sale.com/wp-content/uploads/2024/09/2024090203130076.png)
- Delete or hide menu items::
- Select the menu item to be deleted and click the "Delete" button on the top toolbar.
- pass (a bill or inspection etc)Drag-and-drop adjustment menu itemsThe order and hierarchical relationship of the
![图片[10]-自定义WordPress管理仪表板:全面指南提升网站管理体验-光子波动网 | 专业WordPress修复服务,全球范围,快速响应](https://www.361sale.com/wp-content/uploads/2024/09/2024090203143483.png)
- Restricting access to user roles::
- For each menu item, you can set which user roles are visible.
![图片[11]-自定义WordPress管理仪表板:全面指南提升网站管理体验-光子波动网 | 专业WordPress修复服务,全球范围,快速响应](https://www.361sale.com/wp-content/uploads/2024/09/2024090203170042.png)
- Save Changes::
- When you are done making adjustments, click the "Save Changes" button to make sure your settings take effect.
caveat
- cautious operation: Deleting important menu items may affect site management, so it is recommended to back up before making changes.
- Role Management: Allocate visibility of menu items appropriately and ensure that users with different roles have appropriate access rights.
4. Customize the display of the management toolbar
WordPress Admin ToolbarLocated at the top of the admin area, it is a convenient tool for quick access to frequently used functions. By customizing the contents of the toolbar, you can improve management efficiency and reduce interruptions.
Toolbar customization with the Adminimize plugin
Adminimizeis a powerful plugin that allows you to fully customize the display of the admin toolbar.
- Installation of the Adminimize plugin
![图片[12]-自定义WordPress管理仪表板:全面指南提升网站管理体验-光子波动网 | 专业WordPress修复服务,全球范围,快速响应](https://www.361sale.com/wp-content/uploads/2024/09/2024090203184272.png)
- Access to plugin settings::
- After activating the plugin, navigate to the Settings > Adminimize page.
![图片[13]-自定义WordPress管理仪表板:全面指南提升网站管理体验-光子波动网 | 专业WordPress修复服务,全球范围,快速响应](https://www.361sale.com/wp-content/uploads/2024/09/2024090203195335.png)
- Configuring Toolbar Options::
- In the plugin settings, find "management column"section, respectively, configure the "Admin bar back-end options"and"Admin bar front-end options".
- Select the toolbar items you want to show or hide, such as "New Content", "Comments", "Plug-ins" and so on.
![图片[14]-自定义WordPress管理仪表板:全面指南提升网站管理体验-光子波动网 | 专业WordPress修复服务,全球范围,快速响应](https://www.361sale.com/wp-content/uploads/2024/09/2024090203210146.png)
- Setting user role permissions::
- For each toolbar item, you can set which user roles can see it.
- For example, only letting administrators see the "menu group"Administrative options to prevent access by other users.
![图片[15]-自定义WordPress管理仪表板:全面指南提升网站管理体验-光子波动网 | 专业WordPress修复服务,全球范围,快速响应](https://www.361sale.com/wp-content/uploads/2024/09/2024090203233827.png)
- Save Changes::
- After completing the configuration, click "Update Options" button to save the settings.
draw attention to sth.
- Simplify Toolbar: Only frequently used functions are retained to avoid overly redundant toolbars and to improve operational efficiency.
- Enhanced Security: Prevent unauthorized users from accessing important settings by hiding sensitive features.
5. Change management color scheme
Customizing the color scheme of your admin area not only enhances the visual experience, but also helps you better distinguish between different admin elements and reduce visual fatigue.
Using the built-in color scheme
WordPress offers a variety of built-in admin color schemes to choose from based on personal preferences.
procedure
- Access to personal data::
- In the WordPress admin backend, navigate to Users > Profile.
![图片[16]-自定义WordPress管理仪表板:全面指南提升网站管理体验-光子波动网 | 专业WordPress修复服务,全球范围,快速响应](https://www.361sale.com/wp-content/uploads/2024/09/2024090203265736.png)
- Choosing a color scheme::
- Find it."Managing color schemes"Click on the option "Blue", "Purple", etc. to select your favorite color scheme.
- Click on the color scheme to preview the effect in real time in the admin area.
![图片[17]-自定义WordPress管理仪表板:全面指南提升网站管理体验-光子波动网 | 专业WordPress修复服务,全球范围,快速响应](https://www.361sale.com/wp-content/uploads/2024/09/2024090203254896.png)
- Save Changes::
- After selecting a satisfactory color scheme, click on "Updating personal data" button to save your settings.
Customizing Color Schemes with the Admin Color Schemer Plugin
If the built-in color scheme doesn't meet your needs, you can use theAdmin Color SchemerPlugins to customize unique color schemes.
Installation and Activation
- Installation and activation of the Admin Color Schemer plugin
- Create custom color schemes::
- After activating the plugin, navigate to "artifact" > "Managing Colors"Page.
- Use the tools and options provided to select and adjust various color parameters to create a color scheme that matches your brand or personal preferences.
![图片[18]-自定义WordPress管理仪表板:全面指南提升网站管理体验-光子波动网 | 专业WordPress修复服务,全球范围,快速响应](https://www.361sale.com/wp-content/uploads/2024/09/2024090203310647.png)
- Applying color schemes::
- Once created, click "Save and use" button to place the newColor schemes applied to management dashboardsThe
- Restore Default Settings::
- If you are not satisfied, you can disable the plugin by deactivating it or by adding a new plugin to the "subscribers" > "personal profile"The page loads the default color scheme, restoring the original settings.
caveat
- color contrast: Ensure that custom color schemes have good contrast to avoid visual fatigue caused by prolonged use.
- consistency: Keep the color scheme consistent with your brand's style.
6. Create customized login pages
The default WordPress login page is functional but lacks personalization. By creating a custom login page, you can enhance the user experience while strengthening your website's brand image.
Creating Custom Login Pages with the SeedProd Plugin
SeedProdIt is a powerful page builder, you don't need to write code, easy to design custom login page by drag and drop tool.
Installation and Activation
- Installation and activation of SeedProd plugin
- Configuring SeedProd::
- After activating the plugin, navigate to "SeedProd" > "set up" page, enter the license key (available in your account on the official SeedProd website).
- Create login page::
- Go to SeedProd > Login Page.
- Click "Setting up the login page" button, select a template and start designing.
![图片[19]-自定义WordPress管理仪表板:全面指南提升网站管理体验-光子波动网 | 专业WordPress修复服务,全球范围,快速响应](https://www.361sale.com/wp-content/uploads/2024/09/2024090203323410.png)
- Designing the login page::
- Use SeedProd's drag-and-drop page builder to add and edit page elements such asLogin form, background image, brand logoetc.
- Adjust form labels and text to make sure the page fits your needs and brand style.
![图片[20]-自定义WordPress管理仪表板:全面指南提升网站管理体验-光子波动网 | 专业WordPress修复服务,全球范围,快速响应](https://www.361sale.com/wp-content/uploads/2024/09/2024090203332432.png)
- Setting up redirection::
- Switch to the Page Setup tab and enable the "Redirect default login page" option to ensure that all login requests go to your customized login page.
![图片[21]-自定义WordPress管理仪表板:全面指南提升网站管理体验-光子波动网 | 专业WordPress修复服务,全球范围,快速响应](https://www.361sale.com/wp-content/uploads/2024/09/2024090203334665.png)
- Publish Login Page::
- Once you have completed your design, click "Save and start editing page" and then click "post" button to create a new login page.
vantage
- Enhance brand image: By customizing the design, the login page can be consistent with the overall style of the website and enhance brand recognition.
- Enhanced user experience: Aesthetically pleasing and easy-to-use login pages help to increase user satisfaction and minimize frustration during the login process.
- Enhanced Security: Customizing the login page hides the default login URL, increasing site security and reducing the risk of brute force attacks.
draw attention to sth.
- responsive design: Ensure that the login page displays well on all devices to enhance the user experience.
- Simple Layout: Keep the login page simple, avoid too many elements to interfere with the user's operation, and ensure a smooth login process.
reach a verdict
pass (a bill or inspection etc)WP self-taught website builder, learning to customize your WordPress admin dashboard can significantly improve the efficiency of your website management and user experience. Whether it's hiding unnecessary admin elements, optimizing the block editor interface, or creating custom login pages, these actions can help you create a more organized and efficient work environment.
Link to this article:https://www.361sale.com/en/18391
The article is copyrighted and must be reproduced with attribution.










No comments