


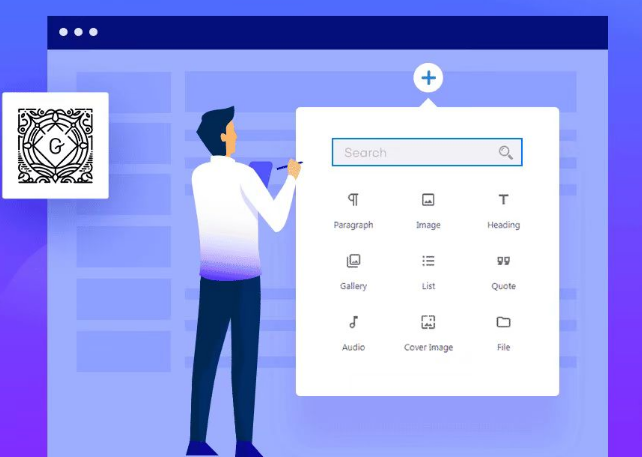
Creating and using Carousel gadgets
Carousel is the latest addition to Elementor Pro's widgets, which allows you to present multiple pieces of content as a slideshow.
![Image [1] - How to Create and Optimize Carousel Widgets in Elementor Pro - Photon Fluctuation Network | Professional WordPress Repair Service, Worldwide, Fast Response](https://www.361sale.com/wp-content/uploads/2024/05/2024052615044392.png)
1. Change Elementor settings
The following Elementor settings need to be adjusted before using the Carousel gadget.
Log in to your WordPress dashboard and navigate to theElementor>set uppage, find the "characterization" tab. This is shown in the figure below:
(Insert screenshot of relevant settings page)
Once you enter the Features page, you need to enable the following features:
- Grid Container
![Image [2] - How to Create and Optimize Carousel Widgets in Elementor Pro - Photon Fluctuation Network | Professional WordPress Repair Service, Global Coverage, Fast Response](https://www.361sale.com/wp-content/uploads/2024/05/2024052614090675.png)
- nested element
![Image [3] - How to Create and Optimize Carousel Widgets in Elementor Pro - Photon Fluctuation Network | Professional WordPress Repair Service, Global Coverage, Fast Response](https://www.361sale.com/wp-content/uploads/2024/05/2024052614184064.png)
Turning on Grid containers and nested elements makes it possible to use the Carousel widget in Elementor.
2.Add Carousel Widget
Once on the Elementor edit page, drag and drop the Carousel gadget into the edit field.
![Image [4] - How to Create and Optimize Carousel Widgets in Elementor Pro - Photon Fluctuation Network | Professional WordPress Repair Service, Global Coverage, Fast Response](https://www.361sale.com/wp-content/uploads/2024/05/2024052614385291.png)
After dragging and dropping, you will see the following screen.
![Image [5] - How to Create and Optimize Carousel Widgets in Elementor Pro - Photon Fluctuation Network | Professional WordPress Repair Service, Worldwide, Fast Response](https://www.361sale.com/wp-content/uploads/2024/05/2024052614390549.png)
3. Editing content in Carousel
You can drag and drop any widget into each cell of the Carousel. For example, if you drag and drop a picture and a caption into a cell, you will see the following screen:
![Image [6] - How to Create and Optimize Carousel Gadgets in Elementor Pro - Photon Fluctuation Network | Professional WordPress Repair Service, Worldwide, Fast Response](https://www.361sale.com/wp-content/uploads/2024/05/2024052614395996.png)
Drag and drop the Video widget to the center cell and the Text Editor widget to the right cell.
![Image [7] - How to Create and Optimize Carousel Widgets in Elementor Pro - Photon Fluctuation Network | Professional WordPress Repair Service, Global Coverage, Fast Response](https://www.361sale.com/wp-content/uploads/2024/05/2024052614401853.png)
The above gives a general idea of the most basic way to create a Carousel gadget. Next, the content and style tags of the Carousel gadget will be used.
4. Carousel's content tags
The Content tab of the Carousel gadget mainly contains the following settings.
![Image [8] - How to Create and Optimize Carousel Widgets in Elementor Pro - Photon Fluctuation Network | Professional WordPress Repair Service, Worldwide, Fast Response](https://www.361sale.com/wp-content/uploads/2024/05/2024052614413617.png)
Carousel setup options:
- Slides: Configure the content and style of each slide.
- Settings: Adjust Carousel's global settings, such as autoplay and speed.
- Navigation: Sets the style and position of the navigation buttons.
- Pagination: Configure the style and position of the paging indicator.
4.1 Slides
Slides is a setting item used to add cells to the Carousel gadget.
![Image [9] - How to Create and Optimize Carousel Widgets in Elementor Pro - Photon Fluctuation Network | Professional WordPress Repair Service, Worldwide, Fast Response](https://www.361sale.com/wp-content/uploads/2024/05/2024052614425360.png)
Carousel sets the content:
- Carousel Item: Add, copy or delete cells and set a title for each cell.
- Slides on Display: Specifies the number of cells displayed in the edit field. Select 3 to display 3 cells; select 5 to display 5 cells.
- Slides on Scroll: Specifies the number of cells that are scrolled at one time when the Carousel is scrolled. A value between 1 and 8 can be set. The larger the value, the more cells will be scrolled at one time.
- Equal Height: Choose whether to turn on the Cell Height Uniformity setting. When turned on, the height of all cells will be automatically standardized.
4.2 Settings
Settings is the setting used to adjust the scrolling effect of the Carousel cell.
![Image [10] - How to Create and Optimize Carousel Widgets in Elementor Pro - Photon Fluctuation Network | Professional WordPress Repair Service, Worldwide, Fast Response](https://www.361sale.com/wp-content/uploads/2024/05/2024052614461150.png)
Carousel Setup Content
- Autoplay: Turns autoplay on or off. When turned on, Carousel will automatically play the content.
- Scroll Speed (ms): Set the scroll speed in milliseconds. The default value is 5000 milliseconds (5 seconds), the smaller the value, the faster the scrolling speed.
- Pause on Hover: Hover Pause. When turned on, scrolling will pause when the mouse hovers over the content.
- Pause on Interaction: Interaction Pause. When turned on, scrolling will pause while the user manipulates the content.
- Infinite Scroll: Infinite scrolling. When turned on, Carousel will scroll the content in an infinite loop.
- Transition Duration (ms): Set the duration of the scrolling effect in milliseconds. The default value is 500 milliseconds (0.5 seconds), the larger the value, the slower the scrolling effect.
- Direction: Select the scrolling direction, either left or right.
- Offset Sides: Sets the safe space at each end of the Carousel, with a choice of both ends (both), left or right.
- Offset Width: Adjusts the width of the safe space; the higher the value, the wider the safe area.
If you don't understand the safe area of Offset Sides, you can refer to the diagram below.
![Image [11] - How to Create and Optimize Carousel Widgets in Elementor Pro - Photon Fluctuation Network | Professional WordPress Repair Service, Worldwide, Fast Response](https://www.361sale.com/wp-content/uploads/2024/05/2024052614480751.png)
4.3 Navigation
Navigation is used to adjust the settings of Carousel's forward or backward arrow icons.
![Image [12] - How to Create and Optimize Carousel Widgets in Elementor Pro - Photon Flux | Professional WordPress Repair Service, Worldwide, Fast Response](https://www.361sale.com/wp-content/uploads/2024/05/2024052614491178.png)
Navigation arrow settings
This setting item contains three main elements:
- Arrows: Choose whether to turn on the navigation arrows. When turned on, users can click on the arrows to toggle content.
- Previous Arrow respond in singing Next Arrow: Set the style and position of the forward and backward arrows. These two settings are identical and are described below:
- Icon: Select or replace the arrow icon. You can choose not to display, upload a custom icon, or select from preset icons.
- Orientation: Specifies the alignment of the arrow in the Carousel, either horizontal or vertical.
- Position: Sets the exact position of the arrow in the Carousel, which can be adjusted horizontally or vertically.
4.4 Pagination
Pagination is a setting that specifies how the bottom cell wizard is displayed. You can choose between dots, numbers, and progress bars.
![Image [13] - How to Create and Optimize Carousel Widgets in Elementor Pro - Photon Fluctuation Network | Professional WordPress Repair Service, Worldwide, Fast Response](https://www.361sale.com/wp-content/uploads/2024/05/2024052614511150.png)
5. Carousel style tags
![Image [14] - How to Create and Optimize Carousel Widgets in Elementor Pro - Photon Fluctuation Network | Professional WordPress Repair Service, Worldwide, Fast Response](https://www.361sale.com/wp-content/uploads/2024/05/2024052614514993.png)
The Style tab of the Carousel gadget contains the following three main settings.
- Slides
- Navigation
- Pagination
Slide Style Settings
Slides: The slide settings in the Styles tab are used to adjust the appearance style of the Carousel cells.
![Image [15] - How to Create and Optimize Carousel Widgets in Elementor Pro - Photon Fluctuation Network | Professional WordPress Repair Service, Worldwide, Fast Response](https://www.361sale.com/wp-content/uploads/2024/05/2024052614534151.png)
Set the content:
- Gap Between Slides: Set the spacing between cells, the range is 0-400. the larger the value, the larger the spacing.
- Background Type: Select the background type, either classic or gradient.
- Background Color: Set the background color, you can select or change any color.
- Border Type: Select the type of border for the cell.
- Border Width: Set the width of the cell border, the larger the value, the wider the border.
- Border Color: Set the border color, you can choose or change any color.
- Border Radius: Set the radius of the cell corners, the larger the value, the larger the radius, the more rounded the corners.
- Padding: Set the spacing between the cell borders and the content, the larger the value, the larger the spacing.
![Image [16] - How to Create and Optimize Carousel Widgets in Elementor Pro - Photon Fluctuation Network | Professional WordPress Repair Service, Worldwide, Fast Response](https://www.361sale.com/wp-content/uploads/2024/05/2024052615052961.png)
Summary:
This tutorial details how theElementor ProCreate and use the latest additions to the Carousel widget. It covers how to turn on the Mega Menu feature, adjust Carousel settings, add and edit cells, set autoplay and scroll speed, configure navigation arrows and paging indicators, and adjust the appearance style of Carousel cells. With this guide, you can get a full grasp of how to use Carousel widgets to enhance the interactivity and visualization of your website.
Link to this article:https://www.361sale.com/en/10555
The article is copyrighted and must be reproduced with attribution.


![Emoji[lenghan]-Photonflux.com | Professional WordPress Repair Service, Worldwide, Fast Response](https://www.361sale.com/wp-content/themes/zibll/img/smilies/lenghan.gif)


No comments